
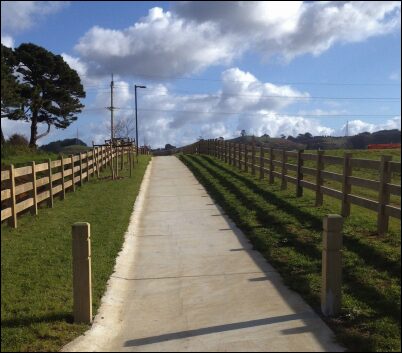
At Beams & Timber, we supply people all over New Zealand with quality timber products such as classic Interlock Post & Rail Fencing. While we craft your fencing materials to your specifications and deliver a quality product, we don’t install the fencing on your behalf.
Installing Interlock Post & Rail Fencing is not complex when you know how. You can hire professionals in your area to do it, or you can follow the instructions in this article to install the fencing yourself. Read on to learn how to set posts, install rails, and ensure the fence is stable and aligned.
Step 1: Set your first post
- You’ll need a starting point for your fence run and it’s best to select an end or corner post as your first post. Mark the centre of that spot with an obvious mark on the ground or with spray paint.
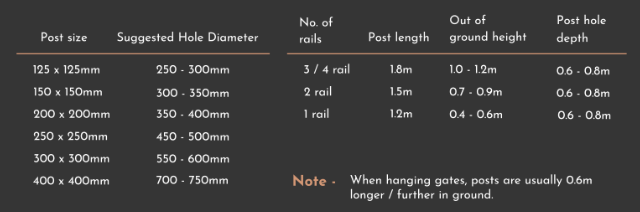
- You now need to determine how high the post needs to be out of the ground. For accuracy, note the table below:
- Place your first (starting post) into the hole, making certain the correct height remains out of the ground. Use a spirit level on two vertical planes to ensure the post is plumb.
- When level, secure the post by ramming the earth back into the hole around the post or secure it with stakes if you’re using concrete.
Step2: Setting up your string line
- For the first run of fencing, decide where the end point will be and hammer a stake into the ground. Alternatively, you could set another post at this point.
- Set the string line slightly off the side of the inline posts. You can attach staples to the posts and tie the string to these, keeping each post the same distance off the string line so they’re not touching it.
- Attach the string to the first post and the end point of the run.
- Consider the weather conditions, as elements like wind can move your string line. Hammer a few extra stakes into the ground between the start and end point for added stability.
Step 3: Install the post and rails for each section
- Take accurate measurements for the next post hole. Measure from the centre point of the first set post. This will give you the centre point of the next hole you need to dig. Just do one or two holes at a time and set your next posts.
- Dig your next hole to the desired depth. You can always adjust the out-of-ground post height by adding or removing soil.
- To allow you to tap in the bottom rail and set the post, angle the post slightly so the top is further away from the first post. You can then do the next rail up and any further rails, straightening each post as you go.
- Use a rubber mallet or small sledge hammer to tap the next post to the rails. Ensure the rail goes all the way back into the rebates. Place a pencil mark 35mm off the end of each rail to assist with this step.
- Once all rails are in place, check the post is level on both vertical planes and that the height is correct.
- Secure the post by ramming earth back into the hole, or affixing stakes and pouring concrete. All the while, keep checking the post with your spirit level to ascertain it remains perfectly upright and that it hasn’t gone out of square by rotating in the hole.
- Keep repeating the above steps until you complete the installation of your fence run.
Step 4: Angled rails
- For some fencing situations, angled rails may be necessary, where the rail comes out of the post on an angle. This requires an adjustment to the end of the rails and possibly to the rebate it slots into.
- At the desired angle, slide the rail into the rebate and mark that angle on top and bottom with a pen or pencil.
- Now use a square to mark a line across the face of the rail, connecting the lines on the top and bottom. Set the correct angle of your skill saw and slice off the piece of timber. Do a test cut outside the line first to ensure the angle is right.
- Measure from the edge you just cut to the edge of the rail. Determine where it measures 35mm from the cut edge to the rail’s edge. The new mark needs to be at a 90-degree angle to the cut face. Use a square to mark the new line.
- Set your skill saw back to a zero-degree angle and cut along the new line. Now slot the rail into the rebate, making sure it goes all the way back into the rebate. We recommend you nail a screw or fix it under the angled rail so it remains in place.